Language


Views: 212 Author: Yuhang Power Publish Time: 2026-09-05 Origin: Site
Content Menu
● What the Existing Build Guide Covers—and What Builders Still Need
● Understand the Core Parts of a Custom Drone
● Start With a Clear Drone Build Goal
>> Common FPV Drone Build Categories
● Select a Matched Motor, ESC, Propeller, and Battery System
>> Practical 5-Inch FPV Example
>> The 20% Current Margin Rule
● Essential Tools and Safety Equipment
>> Recommended Diagnostic Tools
● Step 1: Assemble the Frame and Prepare Battery Mounting
>> Expert Tip: Check Motor Screw Depth
● Step 2: Install FPV Drone Motors Correctly
● Step 3: Install the ESC, Capacitor, and Flight Controller
>> Solder the Battery Lead and Capacitor
● Step 4: Solder Motor Wires and Check the Electrical System
>> Perform a Multimeter Continuity Test
● Step 5: Connect Receiver, Camera, and Video Transmitter
● Step 6: Configure Firmware Without Propellers
● Step 7: Perform the First Power-Up and Bench Test
>> Bench-Test Motors Before Propellers
● Step 8: Install Propellers and Complete a Safe Maiden Flight
● The Most Overlooked Build Risk: Heat After a Short Hover
● How to Select a Reliable FPV Drone Motor Supplier
● FAQ
>> 1. Is it cheaper to build a drone from scratch than to buy a ready-to-fly drone?
>> 2. What is the most common mistake when building an FPV drone?
>> 3. Can I use any brushless motor with any FPV frame?
>> 4. Why does my FPV motor get hot after a short hover?
>> 5. Do I need a smoke stopper for a first FPV drone build?
Building a drone from scratch is one of the best ways to understand how a multirotor aircraft actually works. A successful custom FPV drone build requires more than installing a frame, motors, flight controller, ESC, receiver, battery, and propellers. It requires correct component matching, clean power wiring, safe bench testing, accurate configuration, and a disciplined pre-flight process.
For first-time builders, the goal should not be building the fastest or most powerful drone. The goal is building a reliable, repairable, and predictable aircraft. A well-matched 5-inch FPV drone with correctly selected motors and electronics is more valuable than a high-specification build with poor solder joints, incorrect motor direction, or an unsafe battery setup.
At Zhongshan Yuhang Power Technology Co., Ltd., we develop and manufacture brushless motors for FPV drones, RC vehicles, fixed-wing aircraft, gimbal systems, high-speed fans, cleaning robots, underwater robots, and other specialized equipment. From a motor manufacturer's perspective, the most dependable drone build starts with a clear definition of its purpose: racing, freestyle, cinematic FPV, long-range flying, indoor flight, payload work, or engineering research.
Many basic drone assembly guides correctly explain the main process: assemble the frame, install motors, solder the ESC and flight controller, connect the receiver, configure firmware, test without propellers, and complete a first hover.
Those steps are essential. But they often leave several critical gaps:
- How to select a matched motor, propeller, ESC, and battery system
- How to calculate realistic current and thermal margins
- How to avoid common motor-screw and wiring failures
- How to validate a build before the first propeller installation
- How to distinguish a harmless startup beep from an electrical fault
- How to build a repeatable pre-flight and maintenance routine
- How to choose components that can be repaired and sourced again
This enhanced guide focuses on those practical areas. It is written for builders who want to understand the system, not simply follow an assembly sequence.
A quadcopter has four propulsion systems working together. Each motor, ESC, propeller, and arm must perform consistently. The flight controller continuously changes motor speed to stabilize the aircraft and respond to pilot commands.
| Component | Primary Job | What to Check Before Buying |
|---|---|---|
| Frame | Holds the complete aircraft together | Propeller clearance, stack mounting pattern, arm thickness, camera space, battery placement |
| Brushless Motors | Convert electrical power into rotational force | Stator size, KV, voltage range, shaft type, mounting pattern, weight, wire length |
| Propellers | Convert motor rotation into thrust | Diameter, pitch, blade count, hub size, material, CW and CCW orientation |
| ESC | Controls motor speed from flight-controller commands | Voltage rating, current rating, firmware support, mounting format, capacitor requirement |
| Flight Controller | Stabilizes the drone and processes pilot input | Firmware support, UART count, gyro quality, board size, connector layout |
| Receiver | Receives commands from the radio transmitter | Radio protocol, antenna placement, voltage requirement, failsafe configuration |
| Video System | Sends camera video to goggles or display | Analog or digital compatibility, voltage range, antenna placement, cooling |
| LiPo Battery | Supplies high-current power | Cell count, capacity, C rating, connector, physical size, actual discharge capability |
| Capacitor | Reduces electrical noise and voltage spikes | Voltage rating, capacitance, lead length, placement near battery pads |
| Battery Strap and Pad | Secures battery to the frame | Strap strength, friction pad, battery position, crash retention |
A basic mistake is treating these parts as independent purchases. They are not. A drone is a power system, mechanical structure, radio system, and software-controlled aircraft combined into one compact platform.
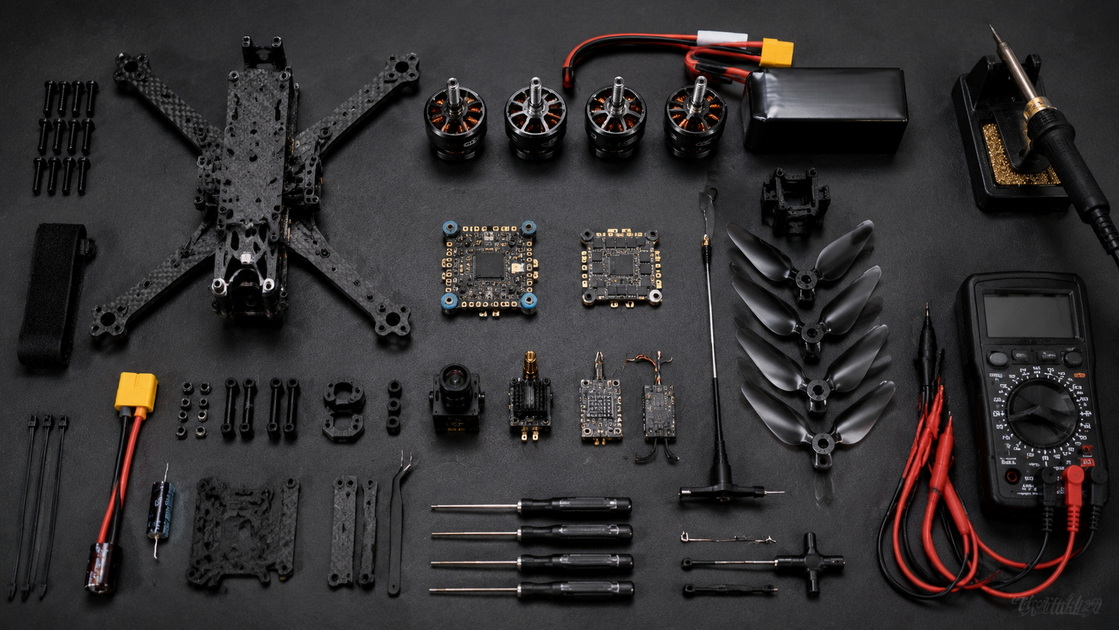
Before ordering parts, define the intended aircraft type. This determines the appropriate frame size, motor size, KV range, battery voltage, propeller diameter, and target weight.
| Drone Type | Typical Frame and Propeller | Typical Motor Direction | Main Priority |
|---|---|---|---|
| Micro FPV | 1.6 to 3 inches | Small high-KV motors | Low weight and responsiveness |
| Cinewhoop | 2 to 3.5 inches with ducts | Lower vibration and controlled flight | Safe close-proximity video |
| 5-Inch Freestyle | 5 inches | Commonly 2207 or 2306 motor class | Durability, punch, smoothness |
| 5-Inch Racing | 5 inches | Often lighter, high-response motor designs | Acceleration and agility |
| Long-Range FPV | 6 to 7 inches | Larger stators and lower KV | Efficiency and flight time |
| Heavy Lift or Custom UAV | 7 inches and above | Application-specific motor system | Payload, redundancy, thermal control |
Motor selection should begin with propeller size and battery voltage, not only a popular motor model.
For example, a 5-inch 6S freestyle drone often uses lower-KV motors than a comparable 4S build. This is because higher battery voltage already increases motor RPM potential. The manufacturer's motor data sheet, propeller test data, and recommended cell count should guide the final selection.
The propulsion system is where new builders make the most expensive mistakes.
A motor can be physically compatible with a frame yet electrically unsuitable for the battery and propeller combination. Similarly, an ESC can fit the stack but fail if its real current capacity is too low for hard throttle use.
Motor KV is approximately the unloaded RPM per volt. It is useful, but it does not tell the complete story.
Motor behavior also depends on:
- Stator diameter and height
- Winding resistance
- Magnet strength
- Propeller size and pitch
- Battery voltage under load
- ESC firmware and timing
- Airflow and cooling
- Aircraft weight
- Pilot throttle behavior
A high-KV motor with an aggressive propeller on a high-voltage battery can overload the motor and ESC. A low-KV motor with an undersized propeller may feel inefficient or underpowered.
For a typical 5-inch freestyle build:
- Frame: 5-inch carbon-fiber frame
- Battery: 6S LiPo
- Motor class: Often 2207 or 2306
- KV range: Commonly lower than comparable 4S configurations
- ESC: 4-in-1 ESC with suitable voltage and current headroom
- Propeller: 5-inch tri-blade propeller matched to flight style
- Capacitor: Installed close to battery input pads
This is only a starting point. Motor recommendations vary by stator design, winding, propeller, target all-up weight, and intended flight behavior.
For a practical build target, avoid selecting an ESC that barely matches the motor's maximum published current.
If a motor-propeller combination can draw 35 A under aggressive test conditions, an ESC with only a 35 A rating leaves little margin for:
- Voltage spikes
- Hot weather
- Poor airflow
- High-pitch propellers
- Damaged bearings
- Heavy battery packs
- Full-throttle bursts
- Manufacturing variation
A sensible design often includes reasonable current headroom, rather than treating the published maximum as a normal continuous operating condition.
A clean and safe build process requires more than a soldering iron.
- Temperature-controlled soldering iron
- High-quality solder suitable for electronics work
- Flux
- Hex drivers in the frame's required sizes
- Wire cutters and wire strippers
- Precision tweezers
- Heat-shrink tubing
- Zip ties or fabric tape
- Digital multimeter
- Smoke stopper
- Threadlocker suitable for metal screws
- Small screwdriver set
- Propeller wrench or nut driver
- Heat-resistant work mat
- Safety glasses
- LiPo battery checker
- ESC signal tester
- Motor thrust stand
- Infrared thermometer or thermal camera
- USB data cable
- Spare motor screws
- Spare XT60 or XT30 connector
- Spare capacitor
- Spare propellers
- Spare battery straps
A smoke stopper is one of the lowest-cost tools with the highest safety value. It can limit current during first power-up if there is a short circuit or incorrect wiring condition.
Begin with the frame because it determines the physical layout of every component.
1. Assemble the lower plate, arms, and standoffs.
2. Do not fully install the top plate yet.
3. Check that the arms are aligned and screws are fully seated.
4. Install the battery pad before electronics block access.
5. Thread battery straps through the frame slots early.
6. Check stack-hole spacing, camera mount clearance, and receiver location.
7. Confirm the battery will not contact sharp carbon-fiber edges.
Carbon fiber can be sharp. Smooth or protect edges that may touch battery straps, wiring, antennas, or signal cables.
Motor screws can be too long.
A screw that extends too far into the motor can contact the copper windings or stator area. This may cause an internal short, damaged winding insulation, increased motor resistance, or immediate motor failure.
Before final installation:
- Compare screw length with motor-base depth.
- Check the motor manufacturer's screw-length recommendation.
- Rotate the bell by hand after tightening.
- If the bell feels rough or catches after screw installation, stop immediately.
- Use washers or shorter screws if necessary.
This simple check prevents a common and expensive failure.
Mount each brushless motor at the end of its frame arm.
- Position motor wires toward the center of the frame.
- Use the correct screw length.
- Apply a small amount of suitable threadlocker to metal-to-metal fasteners if recommended.
- Tighten screws evenly.
- Rotate each motor bell by hand.
- Check for rubbing, scraping, excessive side play, or resistance.
- Avoid pinching motor wires beneath the frame arm.
At this stage, do not worry about clockwise or counterclockwise motor direction. Modern flight-controller software can reverse motor direction later. Focus first on clean mechanical mounting and reliable wiring.
The ESC controls the power delivered to each motor. The flight controller calculates the required motor speeds based on sensor data and pilot commands.
1. Install soft mounts or grommets if included.
2. Position the ESC so battery pads are accessible.
3. Keep the battery lead route short and protected.
4. Check clearance between the ESC and carbon-fiber plates.
5. Confirm the FC-to-ESC connector orientation before final assembly.
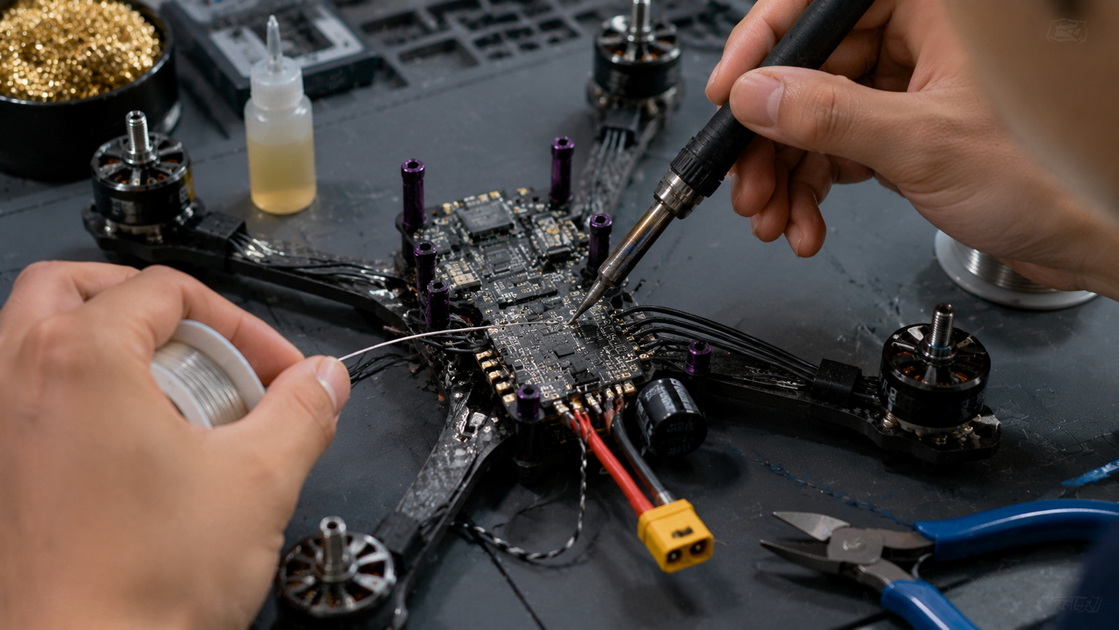
The main battery pads carry high current. Poor solder joints here can cause voltage drop, heat, desync behavior, or power loss.
- Tin the battery pads and wire ends before joining.
- Confirm red wire goes to positive and black wire goes to negative.
- Use an appropriately rated capacitor close to the battery pads.
- Inspect for solder bridges.
- Secure the capacitor so vibration cannot fatigue its leads.
- Add heat shrink and strain relief where appropriate.
ESC switching and motor acceleration can create electrical noise and voltage spikes. A capacitor helps smooth the power input. This can support a cleaner video signal and reduce stress on electronics.
It is not a substitute for correct wiring, a good ESC, or a healthy battery. It is part of a complete power-integrity strategy.
Each brushless motor normally has three phase wires connected to three ESC pads.
For initial wiring, the sequence of the three motor wires does not matter. Motor direction can be changed later in firmware or by swapping any two phase wires.
- Cut wires with enough length for arm movement and repairs.
- Avoid oversized loose wire loops.
- Keep motor wires away from sharp carbon edges.
- Use clean solder joints with full pad coverage.
- Avoid cold, dull, cracked, or oversized solder joints.
- Use strain relief where wires enter the arm area.
- Verify that no wire can reach the propeller path.
After soldering, inspect the entire board under bright light or magnification.
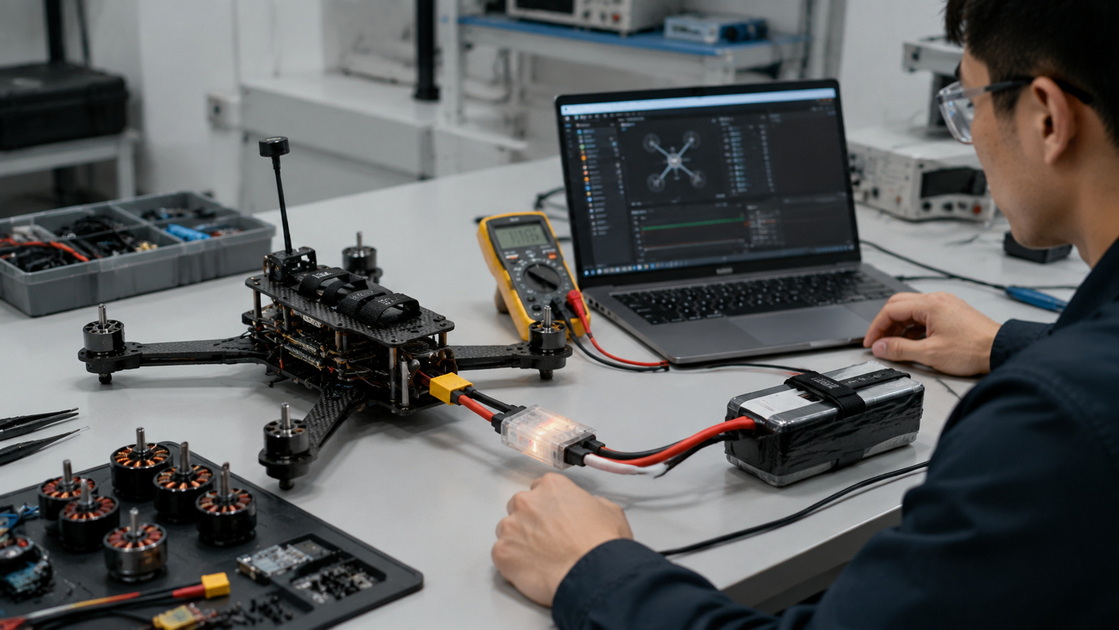
Before connecting a LiPo battery:
1. Set the multimeter to continuity mode.
2. Touch the probes to the main positive and negative battery pads.
3. A constant, strong beep may indicate a short circuit.
4. A brief beep can occur while capacitors charge and is not always a fault.
5. If you are uncertain, stop and inspect the board before applying full battery power.
A continuity test is not a complete guarantee of safety. It is an early warning step that can identify obvious shorts.
The radio receiver links the drone to the transmitter. The camera and video transmitter provide the FPV video feed.
Most receivers require:
- Power
- Ground
- Receiver transmit line
- Receiver receive line
Follow the wiring diagram for the specific receiver and flight controller. The receiver's TX line usually connects to a UART RX pad on the flight controller, while the receiver's RX line connects to a UART TX pad.
Confirm:
- Voltage compatibility
- UART selection
- Correct protocol selection
- Antenna orientation
- Failsafe behavior
- Receiver binding procedure
If using an FPV camera and VTX:
- Follow the manufacturer's wiring diagram.
- Confirm voltage input range.
- Secure the antenna before powering the VTX.
- Keep signal wires away from high-current battery leads when possible.
- Protect the VTX from direct propeller strikes.
- Ensure cooling airflow for high-power VTX settings.
Remove all propellers before connecting a battery for software testing.
This rule should be treated as non-negotiable. A configuration error, wrong motor order, wrong receiver mapping, or accidental arming event can turn installed propellers into a severe injury risk.
Betaflight's Motors tab supports motor and ESC configuration, including motor direction reversal and motor mixing. It also notes that "props in" and "props out" directions can be selected depending on the intended setup.
- Update or confirm appropriate firmware.
- Confirm flight-controller orientation.
- Calibrate accelerometer if required.
- Set receiver protocol and UART.
- Bind the receiver.
- Check stick movement and channel mapping.
- Set arm switch and flight modes.
- Configure failsafe.
- Confirm motor order.
- Confirm motor direction.
- Set battery voltage warnings.
- Check OSD configuration if used.
- Confirm VTX configuration where applicable.
When testing each motor, use the software motor test function at low output. Verify that the motor number and direction match the configuration diagram.
Use a smoke stopper for the first battery connection.
Observe:
- Does the smoke stopper trip?
- Do the ESC startup tones sound normal?
- Does anything become hot quickly?
- Is there a burning smell?
- Does the flight controller power normally?
- Does the receiver bind?
- Does the video system operate?
- Does the motor bell rotate freely?
- Does any motor make an unusual grinding sound?
If an issue appears, disconnect power before touching components. Do not repeatedly reconnect the battery hoping the problem will disappear.
With props removed:
1. Spin each motor slowly in software.
2. Verify correct motor number.
3. Verify correct direction.
4. Listen for bearing noise, rubbing, or vibration.
5. Check that motor wires and solder joints remain cool.
6. Confirm throttle response is consistent.
7. Recheck motor mounting screws.
Install propellers only after all bench testing is complete.
Make sure:
- CW and CCW propellers are on the correct motors.
- The propeller lettering faces the correct direction according to the manufacturer.
- Prop nuts are tightened correctly.
- No propeller contacts the frame, motor wires, antenna, or camera cable.
- The battery is firmly strapped and cannot slide.
- The drone is placed on a level, open launch surface.
The FAA recommends that drone operators inspect the aircraft, propulsion system, power supply, control links, antennas, and related systems before flight.
Before each flight, check:
- Frame arms and screws
- Motor screws and motor-bell rotation
- Propeller condition and prop-nut tightness
- Battery condition, connector, and strap tension
- Receiver link and transmitter battery
- Correct flight mode and arming switch position
- Failsafe function
- GPS lock, where applicable
- Camera and VTX antenna security
- Open flight area and weather conditions
- Local airspace restrictions and operating requirements
Use official resources such as the FAA's B4UFLY service in the United States to check where recreational flying may be permitted or restricted.
For the maiden flight:
1. Stand behind the drone at a safe distance.
2. Arm only when the area is clear.
3. Lift into a low hover.
4. Check drift, oscillation, vibration, motor sound, and response.
5. Land after a short first hover.
6. Inspect motors, propellers, screws, and battery temperature.
7. Continue only if the aircraft behaves predictably.
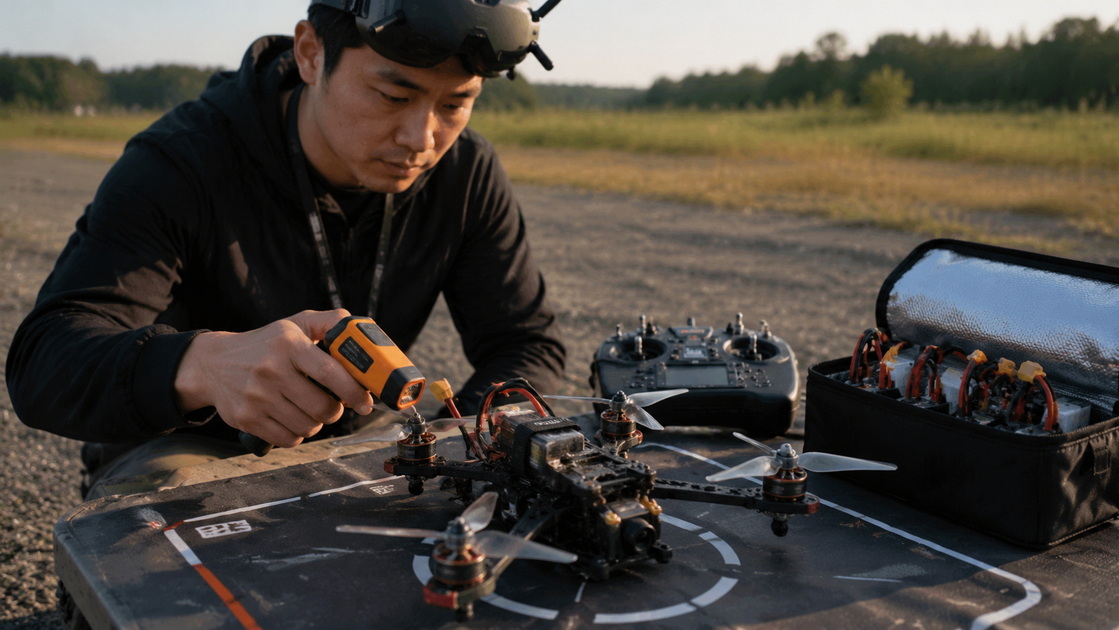
Many builders inspect the drone before the maiden flight but do not inspect it after the first 30 to 60 seconds of hovering.
That is a missed opportunity.
After a brief hover, carefully check motor and ESC temperature. A motor that becomes unusually hot may indicate:
- Incorrect propeller selection
- Excessive motor KV for the battery voltage
- Bent motor shaft
- Damaged bearing
- Bell rubbing the stator
- Incorrect ESC configuration
- Propeller imbalance
- Excessive vibration
- Solder bridge or phase-wire issue
- Mechanical friction from overlong motor screws
This early thermal check can reveal a problem before it damages a motor, ESC, battery, or flight controller.
For hobby builds, a compatible motor from a reputable retailer may be sufficient. For product development, distribution, or a private-label drone project, supplier qualification becomes more important.
A dependable supplier should be able to discuss:
- Motor stator dimensions
- KV options and tolerance
- Magnet grade
- Bearing type
- Shaft material and diameter
- Winding configuration
- No-load current
- Internal resistance
- Recommended voltage range
- Propeller test data
- Dynamic balancing
- Quality-control process
- Custom wire and connector options
- Labeling and packaging
- OEM and ODM support
Zhongshan Yuhang Power Technology Co., Ltd. was established in 2021 and focuses on brushless motor R&D, production, and sales. Its stated application range includes drones, RC vehicles, gimbal shooting, aircraft, underwater robots, and other professional equipment. The company offers power-system solutions and customized OEM/ODM services, supported by a technical team with more than ten years of brushless-motor manufacturing and design experience.
For a custom drone project, share the frame size, propeller diameter, battery cell count, target all-up weight, flight style, expected current range, shaft requirement, annual quantity, and target market. This allows a motor manufacturer to recommend a more suitable motor configuration than a KV-only inquiry.
Building a drone from scratch is not only about assembling components. It is about creating a complete, balanced system that can operate safely and predictably.
Start with a clear flight objective. Select a compatible motor, ESC, propeller, and battery combination. Use clean mechanical assembly and careful soldering. Test every circuit before applying full battery power. Configure motors without propellers. Complete a short, controlled maiden hover. Then inspect the motors, ESC, propellers, and battery before moving to more demanding flight.
For brands, engineering teams, and drone developers that need customized FPV Drone Motors or full brushless power-system support, Zhongshan Yuhang Power Technology Co., Ltd. can support application-based motor selection, OEM customization, and ODM development.
Not always. A first custom build also requires tools, spare parts, batteries, chargers, and time for troubleshooting. However, a custom drone can be easier and less expensive to repair over time because damaged parts can often be replaced individually.
Common mistakes include installing motor screws that are too long, reversing battery polarity, skipping the continuity test, testing motors with propellers installed, using incompatible motor KV and battery voltage, and failing to configure failsafe before the maiden flight.
No. The motor must match the frame mounting pattern, propeller size, battery voltage, target aircraft weight, ESC capacity, and intended flight style. The motor should also have adequate clearance from the frame and correct shaft or propeller-mount compatibility.
Possible causes include propeller overload, incorrect KV for the battery voltage, motor damage, bent shaft, bearing friction, ESC settings, propeller imbalance, poor airflow, or incorrect motor screws. Stop flying and identify the cause before continuing.
A smoke stopper is strongly recommended. It can limit current when a short circuit or wiring problem is present during first power-up. It does not replace a multimeter test or correct soldering practice, but it can reduce damage from common build errors.
1. [How to Make a Drone From Scratch — YAHREE]
Source article reviewed for the core sequence of frame assembly, motor mounting, ESC and flight-controller installation, receiver wiring, firmware configuration, continuity testing, and maiden-flight process.
2. [Zhongshan Yuhang Power Technology Co., Ltd. — About Us]
Company information covering brushless motor R&D, manufacturing, application areas, power-system solutions, technical-team experience, and OEM/ODM support.
3. [Motors Tab — Betaflight Documentation]
Motor configuration, motor-direction reversal, mixing, and flight-controller motor testing information.
4. [Unmanned Aircraft Systems — Federal Aviation Administration]
Official U.S. drone safety resources and rules for recreational and professional pilots.
5. [B4UFLY — Federal Aviation Administration]
Official resource for checking U.S. airspace information and recreational-flying restrictions.
6. [UAS Preflight Checklist — Regulations.gov]
FAA-related pre-flight inspection guidance covering propulsion systems, batteries, control links, aircraft condition, and operational checks.
7. [Batteries — U.S. Consumer Product Safety Commission]
Safety background on handling high-energy-density batteries and testing batteries, chargers, and end products as a system.


